Chicken Marsala

I have to tell you, I love chicken! I could eat it everyday. Mr…not so much. He could eat red meat everyday! Mr. likes his red meat, as most men do! 🙂 But lately I’ve been trying to limit the amount of red meat that we eat. I have even switched to using ground turkey in several recipes instead of ground beef. And more times than not, when we it out at restaurants, I order chicken.

So I’m always on the search for a new chicken recipe. I found this one on Land O Lakes website. Prep was quick and easy, plus it tasted great!

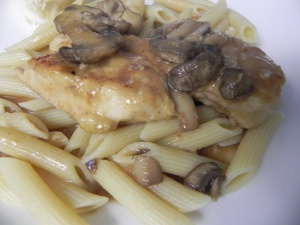
Chicken Marsala

Chicken Marsala

1/4 cup all-purpose flour

1/2 tsp salt

1/2 tsp pepper

4 Tbl butter, halved (I always use unsalted Land O Lakes butter)

16 oz.  boneless, skinless chicken breasts

3 cloves fresh garlic, minced

1 cup dry Marsala wine or chicken broth

8 oz. package sliced mushrooms

Combine flour, salt, and pepper in large, resealable bag. Melt 2 T butter in shallow bowl. Dip chicken into butter and place into bag. Reseal and shake gently to coat.

Melt remaining 2 T butter in skillet until sizzling. Add chicken and garlic. Cook over medium-high heat, turning once, 6-8 minutes or until chicken is browned. ( if necessary, reduce heat to prevent  garlic from burning) Add wine or broth and mushrooms. Continue cooking 4-6 minutes or until chicken is done and no longer pink and sauce is slightly thickened.

Serve over pasta, if desired.

*I used chicken broth instead of wine, as this was what I had on hand.

*Since I wanted the garlic to get golden brown, I frequently stirred the garlic and butter to keep it from burning.

*When it comes to cooking chicken, I usually cook it several more minutes than what the recipe calls for, as I want to make sure that it’s done. I cooked the chicken in this recipe for approximately 20 minutes in total.

*The online recipe suggested fettuccine pasta, but I had some penne on hand and just used that.

Chicken Marsala

 Y’all have a great day! Later gators!

Garlic Monkey Bread Minis


I don’t know about you, but Pinterest is practically the only “cookbook” I need these days. I was looking for a quick, hot bread to serve with spaghetti, and Pinterest is where I found Mini Garlic Monkey Breads from Eat Cake For Dinner.

They are quick to make and so savory and good! I hope y’all like them as much as we did.

Garlic Monkey Bread Minis

DSCN3174

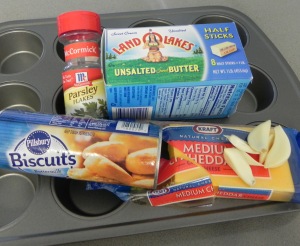
2 (7.5 oz) cans buttermilk biscuits

6 Tbl butter, melted (I use unsalted butter)

3 cloves garlic, minced

2 Tbl dried parsley flakes

1/2 cup cheddar cheese

DSCN3171

Preheat oven to 400 degrees. Lightly spray a 12-cup muffin tin, using cooking spray.

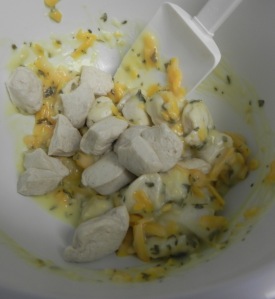
Separate biscuits, cut each into quarters, and place in a bowl. In a separate bowl, mix remaining ingredients together and pour over biscuits. Gently toss to coat.

DSCN3172

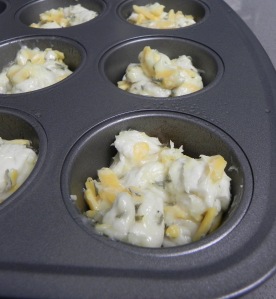
Place 6-7 pieces of biscuit in each cup.

DSCN3173

Bake for 9-12 minutes or until golden. Makes 12. Serve warm.

Hot bread + garlic = YUM!

*I only made half the recipe since it’s just Mr. and I, but still used all three cloves of garlic.

*The original recipe called for parmesan cheese but I substituted cheddar cheese, as I don’t care for parmesan.

Y’all have a great day! Later gators!
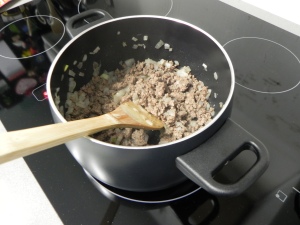
Easy Spaghetti Sauce

I am sooo over winter, as I am not a cold-weather girl! I’m not even a cool-weather girl!! Give me 90 degrees everyday and I will be one happy-flip-flop-wearing gal! 🙂

The only good thing about cool weather is the hot comfort food that comes with it. And one of those comfort foods is spaghetti. I love spaghetti, and for probably the first twenty years of mine and Mr.’s marriage, my spaghetti sauce came from a jar. But it was always a little too tomato-y for me, as I’m not a huge fan of tomatoes. So I found a meat sauce recipe, tweeked it to our taste, and have been using it for close to 10 years now.

Mr. loves spicy food (the hotter the better), so this recipe is on the spicy side. (check the bottom of post for non-spicy substitutions) And I don’t like my sauce soupy, so if you do be sure and add more water to the recipe.

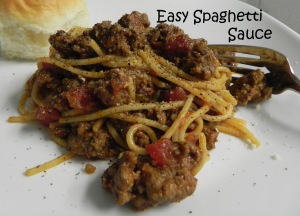
Easy Spaghetti Sauce

DSCN3063

8 oz. spaghetti

1 lb. ground beef

2-3 cloves garlic

1 can Rotel

1/2 can (6 oz.) tomato paste

1/2 tsp oregano

1/2 tsp sugar

1/4 – 1/2 cup water

Salt & pepper, to taste

Bring water to a rolling boil in pot. Add spaghetti and cook according to directions.

Brown beef and garlic in large skillet. Drain grease, if necessary.

Add remaining ingredients and simmer 10-15 minutes.

When tender, drain water from spaghetti. Add sauce to pot and stir to mix.

Serve immediately and enjoy!

*If you like a stronger garlic flavor (like us), add garlic at the end of recipe instead of the beginning.

**For non-spicy, substitute 1/2 cup chopped onion and 1 can (14 oz) petite diced tomatoes in place of Rotel. Add chopped onion to skillet to brown with beef.

Y’all have a great day! Later gators!

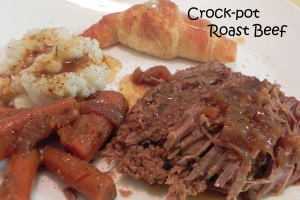
Crock-Pot Roast Beef

Happy Friday y’all! Hope everyone is staying warm during this crazy weather! It’s funny how quickly Mr. and I have become acclimated to the Houston weather. Being from Oklahoma, we are used to freezing temperatures, icy roads, and snow! But we absolutely freeze now if the temperature drops into the 60’s! I know…we have become wienies. But I’m okay with that. 🙂

And since the weather was unseasonably cooler this week, I’ve been looking for warm comfort food to cook. I found this crock-pot recipe on Pinterest and decided to try it out. I used it as the base to mine and added onions, carrots, and garlic. It really can’t get much easier than this recipe.

Roast 8

2 lbs. beef roast

1 envelope brown gravy

1 envelope Ranch dressing

1 envelope Italian dressing

1/2 cup water

1 large onion – sliced

5-6 carrots – chunked

2-3 cloves garlic – minced

Roast 1

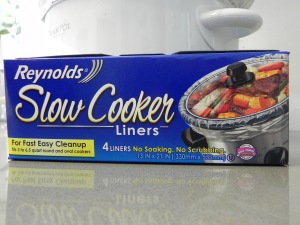
Line cooker with liner bag. (don’t crock-pot without these) Add roast, onions and carrots to cooker.

Roast 6

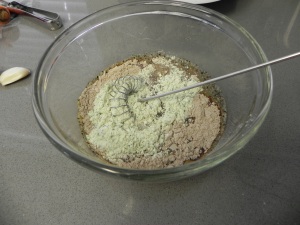
Whisk together gravy, Ranch, and Italian mixes in 1/2 cup water. Add in garlic. Mix well and pour over roast.

Roast 2

Cook on low for 7-8 hours.

Roast 4

Easy, huh? And to make your time in the kitchen a little easier, I want to share a couple of tips with you.

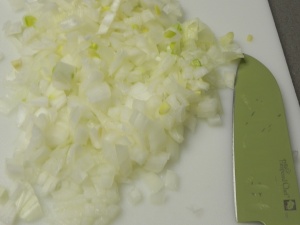
#1 – I get fresh onions in the summertime from my uncle in Oklahoma. We keep out what we know we’ll eat fresh and then slice the rest and put in freezer bags. We put one onion per quart bag – then put in gallon size freezer bags. (gallon size will hold 4-5 quart bags of onions) This way, when I need an onion for a recipe, I just grab a bag out of the freezer and it’s already sliced and ready to go!

#2 – Slow Cooker Liners – these are a lifesaver when it comes to cleaning your crock-pot. These liners are the only reason the inside of my crock-pot is still white!  Like I said before… “Don’t crock-pot without these!”

Roast 3

#3 – Garlic Press – if you cook with fresh garlic, this is a wonderful gadget! And if you’re not cooking with fresh garlic…you gotta try it! Yum!

Y’all have a great weekend! Later gators!

Mexican Soup…

…or Taco Bean Soup, as my Aunt Sonia called it. I got this recipe from her years ago. It’s also in the recipe book, The Good Cooks’ Cookbook, by the Arts and Craft Club of Falconhead Country Club, Burneyville, Oklahoma, which she was a member of. She was a very crafty lady, and I adored her! As a child, she taught me how to crochet, macramé, make salt dough, and so much more!

And she was a great cook! If you like your soup a little more spicy like us, swap out the can of tomatoes for a can of Rotel. Yum! It is so good on a cold night and so easy to fix. And it freezes wonderfully!

Mexican Soup

DSCN2665

1 lb. ground hamburger meat

1 medium onion, chopped

1 15 oz. can whole kernel corn

1 16 oz. can kidney beans (I use light red kidney beans)

1 15 oz. can pinto beans (I use jalapeno pinto beans for more kick!)

1 14 oz. can diced tomatoes

1 envelope taco seasoning

1 envelope dry ranch dressing

1 clove garlic – minced

Salt and pepper to taste

Cheddar cheese – grated

DSCN2663

DSCN2660

DSCN2661

Brown hamburger meat and chopped onion together. (I brown mine in the same pot that I cook the soup in = less dishes) Add canned vegetables (do not drain) and dry seasonings. Add minced garlic and stir. Bring to boil then let simmer for 15-20 minutes.

Spoon into bowls and top with cheese. Serve with tortilla chips, crackers, or cornbread!

DSCN2666

Makes 8 servings – one cup each

269 calories per serving

Hope you y’all enjoy it as much as we do! Later gators!

Jalapeno Popper Dip

Happy Cinco de Mayo, everyone!! Hope everyone had a terrific weekend. We had a Pool Opening Party on Saturday, except the pool temperature was still too chilly for us to get in! (although, Mr. did jump in two weeks ago to fix the pool light, brr!) But at least the weather was perfect for the get-together!

I made this flip flop wreath for the party to hang on the gate. Really easy and sooo colorful!

flip flop wreath

We had lots to eat and drink, and the company was great! A few things on the menu were Baked Hawaiian Sandwiches, BBQ Brisket, and Jalapeno Popper Dip. This dip is yum-my! But I have to warn you…it spares no calories!! I guess that’s why it’s so tasty and good!! 🙂

Jalapeno Popper Dip

2 – 8 oz. cream cheese – room temperature

1 cup mayonnaise

1 cup shredded Mexican cheese

1/2 cup grated Parmesan cheese

4 oz. can diced green chilis (I left these out of my mine)

4 fresh jalapenos – deseeded and diced

               ~~~~~~

1 cup Panko bread crumbs

1/2 cup grated Parmesan cheese

1/4 cup butter – melted

Mix the 1st six ingredients together. Spread into a greased 2 quart baking dish.

Mix the bread crumbs, 1/2 cup Parmesan cheese, and butter together. Sprinkle over top of dip.

Bake at 375 degrees for 20 minutes or until top is brown and bubbly.

Hope y’all enjoy it as much as we do! Y’all have a good week.

Later gators!

Banana Muffins

Happy Friday everyone! Do y’all have big plans for the weekend? We will still be working on the guest bathroom makeover. The walls have been painted (looks 100 times better and brighter) and the floors have been primed. I’m going to put the first coat of paint on the floors tonight after Mr. gets home from work. I’m a little apprehensive to start by myself, as I’ve never used floor paint before. And it’s always nice to have someone else with the same questionable look on their face when you start something new! 🙂

We’re also leaving on Sunday for a conference in Dallas, so everything should be good and cured by the time we get back. And since we’ll be on the road for over a week, I’m going to make Banana Muffins for us to snack on. Hopefully, it’ll keep me from visiting the vending machine at the hotel too many times! These muffins are really moist and at only 107 calories a piece, they are much easier on the waistline (and thighs) than a candy bar. And they are also a great way to use very ripe bananas. On most occasions, I cut the recipe in half and only use the 2-3 bananas that I have and make nine muffins.

Banana Muffins

Banana Honey Muffins3

1 3/4 cups (about 4) mashed bananas

3/4 cup packed light brown sugar

1/4 cup honey

4 T margarine, melted (I use butter)

2 cups self-rising flour (VERY important to use self-rising 🙂)

1 tsp. baking powder

pinch of salt

3/4 cup (5 oz.) roughly chopped walnuts – optional

Banana Honey Muffins

Preheat oven to 350. Place 18 paper baking cups in muffin pans.

In a large bowl, combine the bananas, sugar, honey, and margarine. Beat with an electric mixer until well blended. Slowly add the flour, baking powder, and salt, and mix well. If using, fold in the chopped walnuts after everything is well mixed. (a potato masher works great to mash the bananas)

Banana Honey Muffins2

Spoon the batter into the paper cups. Bake for 20 minutes. Remove from oven and cool for five minutes. Remove the muffins from pans and continue cooling on a rack.

Store in an airtight container for up to two days, or freeze for up to three months.

Y’all have a great weekend and next week! Later gators!! 🙂

Crock-Pot BBQ Brisket

Happy Friday!! What have y’all got going this weekend? Mr. and I are going to Waco tomorrow to the Junk Hippy Roadshow! It is “the fun and funky, shabby and junky, sparkly, shiny, rusty and chippy traveling junk show”!! Lovin’ me a road trip!

I’m also lovin’ my slow cooker. I’ve had this cooker for a couple of years now, but only used it once before we moved into our new house. Nowadays, I use it just about every week. Today’s recipe is another easy-peasy slow cooker one.

Crockpot BBQ Brisket

DSCN2149

3-4 lbs. beef brisket

3/4 cup bbq sauce (my favorite is Head Country)

1/4 cup flour

1 onion – sliced

Walker & Sons “Slap Ya Mama” Cajun Seasoning

Fresh Ground Black Pepper

Line cooker with liner bag. Season both sides of meat with seasoning and pepper. Add onion to cooker and place brisket on top of onion.

DSCN2147

DSCN2145

DSCN2146

Combine bbq sauce and flour together and mix well. Pour sauce over meat. Cook on low 4-6 hours or until tender.

That’s it! Easy, huh? And any leftovers make wonderful chopped brisket sandwiches the next day! Yum!

Y’all have a great weekend!

Crock-Pot Sweet Garlic Chicken

Yay, it’s Friday! I don’t know about you, but I am ready for the weekend! So let’s get this post a-going so we can enjoy this weekend.

Yesterday I fixed a new recipe that I found on Pinterest. If you like the smell of garlic and soy sauce simmering, then you’re going to love this recipe!

Crock Pot Sweet Garlic Chicken

DSCN2168

Prep was easy-peasy.

DSCN2160

  • 4-6 chicken breasts
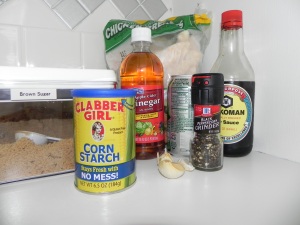
  • 1 cup packed brown sugar
  • 2/3 cup vinegar (I used apple cider vinegar)
  • 1/4 cup lemon-lime soda (diet or regular)
  • 2-3 Tablespoons minced garlic (I used fresh garlic)
  • 2 Tablespoons soy sauce
  • 1 teaspoon fresh ground pepper
  • 2 Tablespoons corn starch
  • 2 Tablespoons water
  • Red pepper flakes (optional)

Either spray your slow cooker with a non-stick spray or use slow cooker liners. (Personally, I think the liners are awesome! Makes cleanup so much easier.) Place chicken (frozen, thawed or fresh – mine was frozen) inside cooker. Mix together sugar, vinegar, soda, garlic, soy sauce and pepper. Pour over chicken and cover. Cook on low 6-8 hours or high for 4 hours.

DSCN2163 DSCN2164

Once chicken is fully cooked, take pieces out of cooker and pour remaining sauce into saucepan. Heat sauce over med-high to high heat. Combine cornstarch and water together, pour into saucepan, and mix well. Let sauce boil until it thickens and becomes a glaze, stirring often. (mine thickened very quickly) I served the chicken on a bed of white rice and steamed veggies on the side!

Hope y’all have a great weekend!

Baked Hawaiian Sandwiches

Happy Friday and Happy November!! So how many of you are quickly removing all the leftover Halloween candy from the house….by eating it?! I have to confess, I have had my share plus some of chocolate today! From now until New Year’s, I accept the fact that I will gain weight. And several pounds of it! I love to eat. And I love to eat fattening things! In fact, I fixed a not-so-healthy-not-so-low-calorie meal last night, due to the fact that you can’t eat just one!

I made Baked Hawaiian Sandwiches. Yummm! They are so easy and so tasty. I served them with potato salad, fresh guacamole, and chips.

There are several recipes out there and vary in ingredients. I got my recipe from a very good friend, Cece, who served them at her wedding reception last year. She said she got the recipe from a friend, who got it from a friend, who got it from a friend! Those are the best kind of recipes. Tried and tested!

Baked Hawaiian Sandwiches

DSCN2134

1 pkg. King’s Hawaiian Rolls

12 slices Honey Ham

12 slices Smoked Turkey (I use Cracked Pepper Turkey)

6 slices Provolone cheese

6 slices Swiss cheese

1 stick Butter

2 T Poppy Seeds (I don’t use these)

4 T Sugar

4 T Onion Flakes

1 T Honey Mustard

Preheat oven to 350F.

Cut the entire package of rolls in half lengthwise, but keep intact. You’ll end up with one top and one bottom. Lay top aside.

DSCN2136

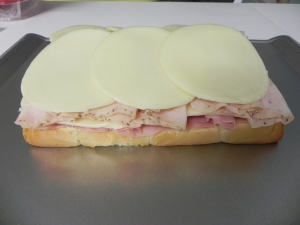
Alternate layers of meat and cheese. Place top rolls over meat/cheese.

DSCN2137     DSCN2138

Combine butter, sugar, onion flakes, and mustard in small saucepan and heat until warm and creamy.

DSCN2140

Drizzle mixture over top of sandwiches. (Cece said she sometimes brushes the mixture on for a more even coat. I had to drizzle, as my brush has ran away and is nowhere in sight!)

DSCN2141

Bake sandwiches in preheated oven on lower rack for about 10-15 minutes or until lightly brown and fillings are hot. (You can cover with foil if they are browning too quickly and are not heated completely)

Separate into individual sandwiches. Serve warm and watch them disappear!

Enjoy!